
How To Hack DNS For Faster Internet Speed
What is DNS?
Now talking firstly about basic of DNS which stands for Domain name server which converts your IP address into your domain address and vice versa. This is a protocol. This was designed because it is very difficult for a human being to learn the digits of an IP address and think about remembering the IP address of all your favorite sites. That’s why DNS is designed which automatically converts your alphabet worlds into their respective IP address.
How To Use Alternative DNS Services To Speed Up your Internet?
Your slow internet speed is not always a fault of your Internet Service provider. It might be of your default DNS services sets to browse on your internet. So, I recommend you to use some alternative DNS instead of DNS provide by your ISP’s. Therefore, here I will tell you to use a free public DNS service that will tell your computer to use that service instead of using your ISP prescribed service and will help you to get a faster internet speed on your device.
How To Speed Up Web Browsing Using DNS Hack
Now to get a faster internet speed, I’ll tell you about free OpenDNS services that are one of the most popular free DNS services that were started to provide an alternative method to those who were discontented with their existing DNS services. Just follow the below steps to do so.
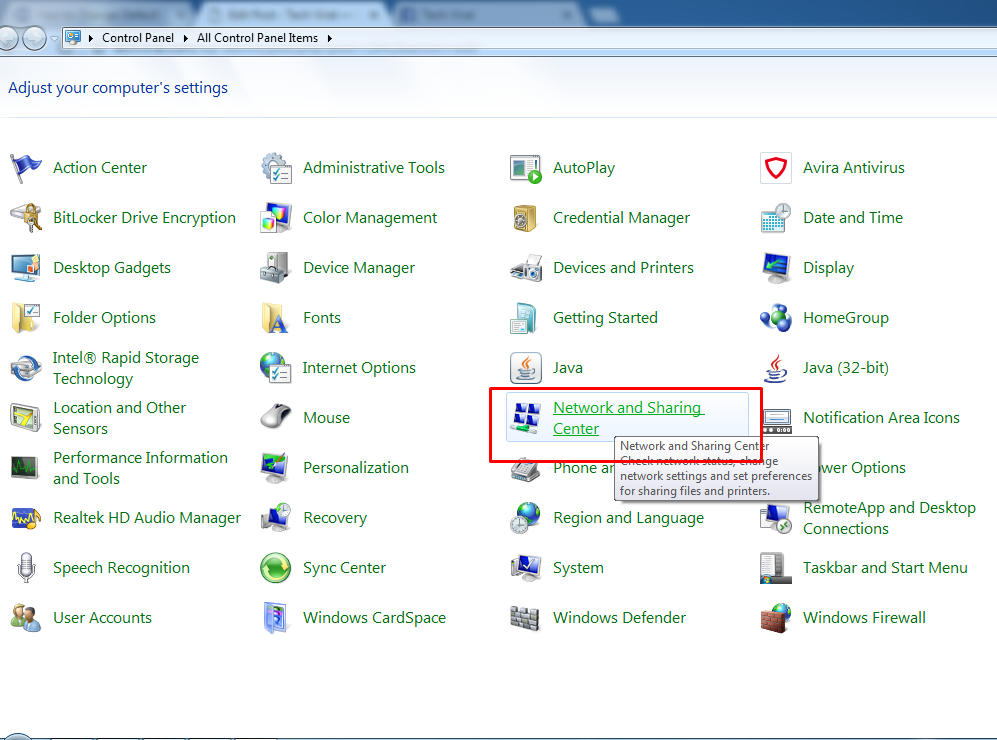
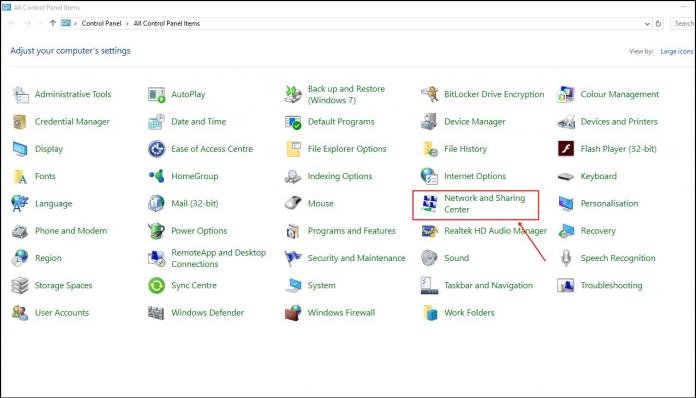
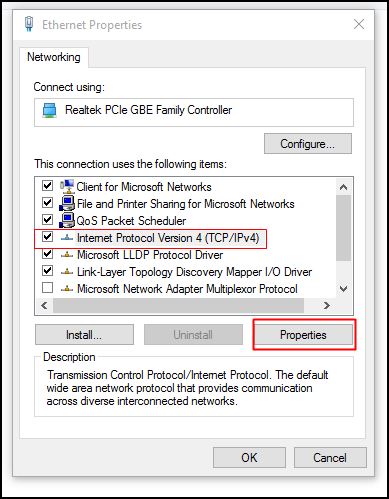
Step 1. Go To Control Panel > Network and Internet options.
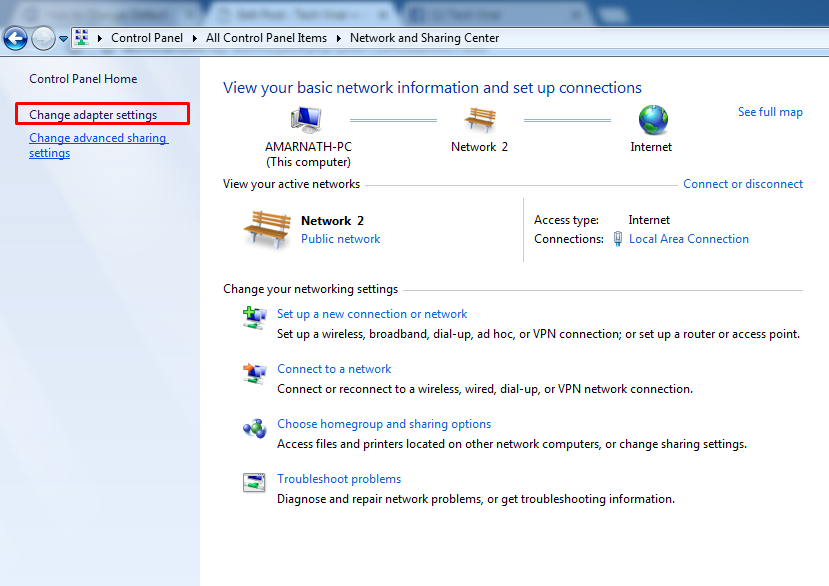
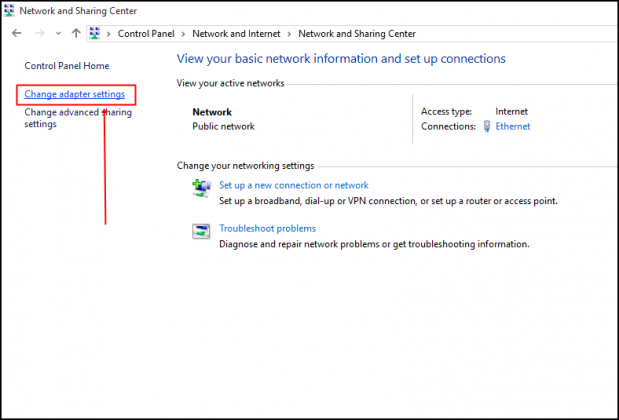
Step 2. Now you need to click on “Change Adapter settings”
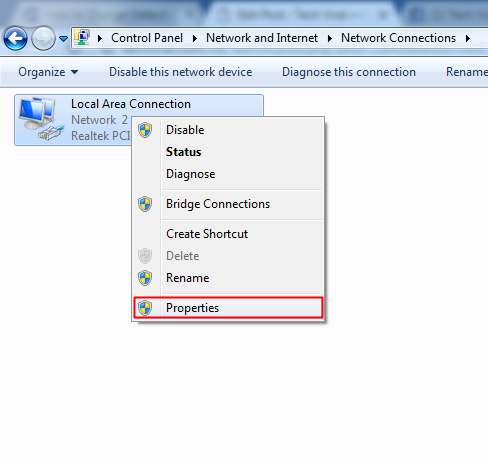
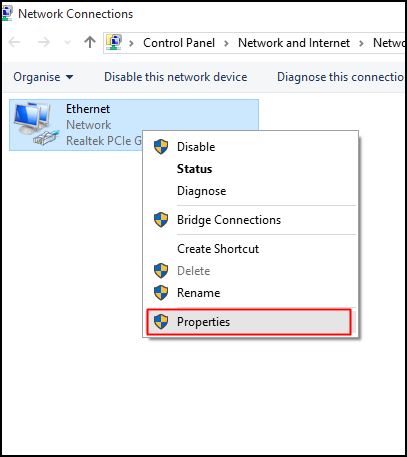
Step 3. Click on your internet connection that you have currently connected and open properties of that network.
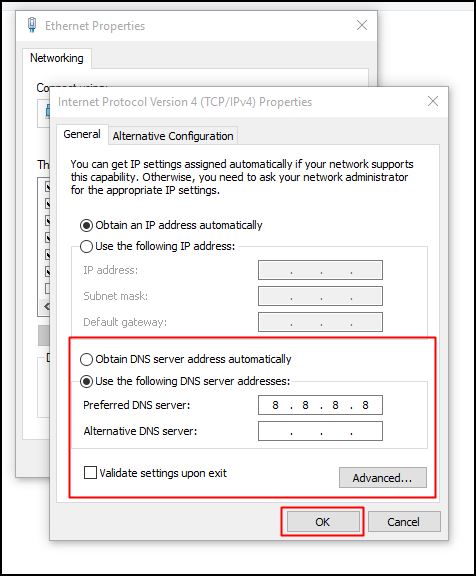
Step 4. Now click on the Internet Protocol Version 4 (TCP/IPv4) and click on Properties. Now choose the following DNS server addresses to get a faster internet speed
*Preferred DNS server: 208.67.222.222
*Alternate DNS server: 208.67.220.220
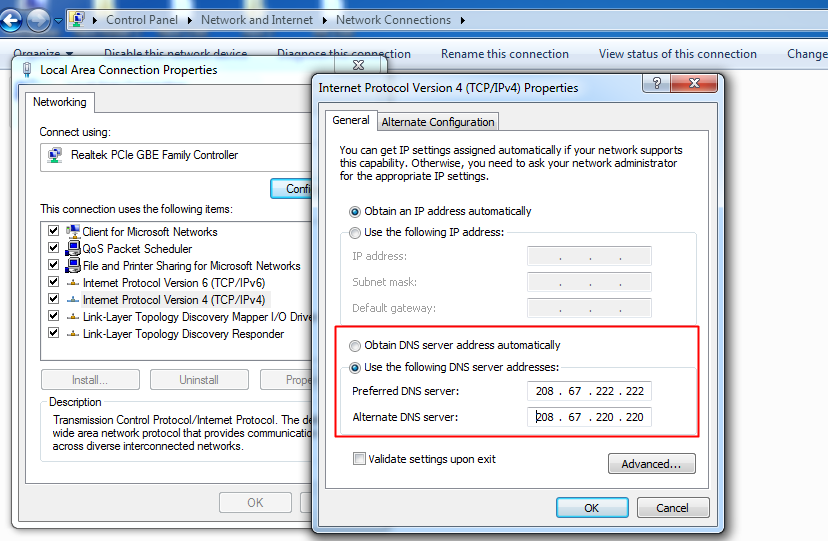
Step 6. Now click on OK and now configure Ipv6
*Preferred DNS server: 2620:0:ccc::2
*Alternate DNS server: 2620:0:ccd::2

Save all the settings, and now you are using a DNS with fast internet browsing. That’s it! You are done. By doing this, your internet speed will be much faster.
Change Default DNS to Google DNS for Faster Internet

The method is very simple, and you can easily change your default DNS and will get the switch to a high-speed DNS. You will experience better internet browsing and download. You just need to follow our article How to Change Default DNS to Google DNS for Faster Internet where we have listed the step by step guide to change default DNS to Google DNS
Manually Setting Up Google DNS in Windows Computer
Step 1. First of all, from your windows computer browse to Control panel and then select the option Network and Sharing center.
Step 2. Now you need to click on “Change Adapter Settings”
Step 3. Here you will see your connected network. Simply right click on the connected network and then select the option “Properties”
Step 4. Now browse to Networking tab and then under ‘This connection uses the following items’ select the option Internet Protocol Version 4 (TCP/IPv4) and then click on properties.
Step 5. Now under General, choose the option “Use the following DNS server Addresses”. Now you need to fil in the DNS value 8.8.8.8 or 8.8.4.4 and then click on “OK” then restart your network.
That’s it! You are done, now you are switched to Google DNS server and observe the change in your internet speed which will be reasonable.
Using DNS Jumper
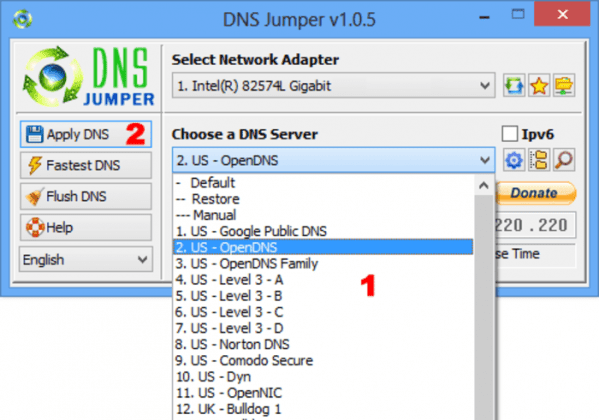
It is an app that helps to change the DNS server. You can use it to choose a DNS server manually. You just need to download the tool on your Windows computer and install it. Open the app and choose the DNS server, the list includes Google Public DNS, Open DNS, Yandex and much more. Simply, select the DNS and click on “Apply DNS”.
source:TV
source:TV


